
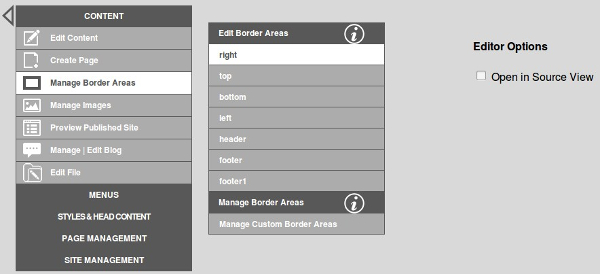
In some cases you may want to have a different border area or areas on a particular page or group of pages from the rest of your pages. To do this, just click one of the add buttons (Right, Left, Top, Bottom, Header or Footer) as shown below. Additionally, you may select a page to assign the new border area to. This will automatically append the name of the page to the border area, i.e. right_about. You may also type any name suffix you want in the box to the right of the page list. Upon clicking Assign Another Border Area, the new border area will be created with the name you have given it, and assigned to the page you have selected. A common usage for this are sites that display different links, bullet points or images along the right to go along with the content of that page. If you do not select a page to assign your new border area to, and you do not enter your own suffix, the next sequential number will be appended to the area name. For example, if only right exists, the new area will be right1, if right1 exist, the new area will be right2. You may also type in your own name such that the border area names are meaningful to you. For example, use right_about for the about page. Note: The underscore is added automatically whether you include it
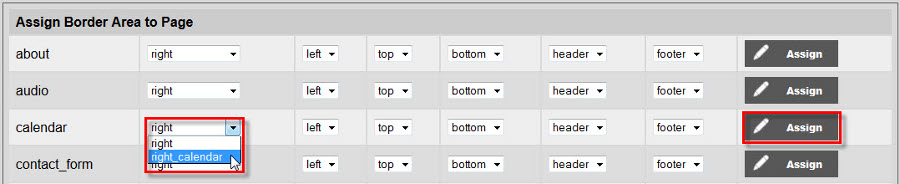
Next you will want to assign that new area to your page or pages as shown below:
When a border area is no longer needed, you may prune it as shown below. Note: The system will not allow you to delete the stock border areas, only the additionally created ones. You may also rename your border areas at any time. The prefix will remane the same. For example, if you wanted to rename right_about by typing in home, it will be renamed right_home.

Users may assign multiple sections to one border area. This will enable the user to call on multiple modules and plug ins to appear in the same border area. You can find this option in the Manage Border Areas section of the Breeze Website Builder. More information can be found in the Managing Page Attributes section of the help guide.
By default, any custom content you place into the border area using the Breeze Website Builder will appear above the default content. A special pre-designed string is used as a separator that will allow you to put custom content above, below or surrounding the default content if so desired. To do this, place inside of your content using Source view in the editor. The custom content will follow this string. If the string is placed in the middle of your custom content, the content will surround the string. If you leave the string out entirely, the custom content will default to the top of the border area. If the string is placed before the custom content, the custom content will be pushed to the bottom of the border area.